A while back ago I was learning/playing with machine/deep learning but all that was only in Python, in a Jupyter Notebook. Latter allows writing and running and executing scripts in a browser window. Unfortunately I was not aware of any obvious way to easily reuse those scripts in a webapp. So I decided to write an example of how would it look like to be able to call Python scripts from withing a running server application, hence this article.
There was an attempt to use Python alone for both the server and scripting, unfortunately it failed, most likely due to the fact that I am mostly Javascript / Java programmer these days. Writing webapp with Flask, which is one of the popular choices among Python developers, was a tedious experience for me compared to development process with Express(Node.js) or Spring Boot(Java). I still managed to wrap that half finished attempt in Docker and deploy to AWS though.
Another more elaborate and a bit more successful implementation of this idea using Node.js can be found in Github repository ivarprudnikov/char-rnn-tensorflow. It uses a Python script which is an implementation of Recurrent Neural Network (RNN) character generator written in Tensorflow framework. I’ve written about it as well in another post “Run Tensorflow scripts from Node.js server deployed on AWS as Docker container”
Source code
You could also go directly to the Github repository which contains sample node server implementation ivarprudnikov/use-python-in-node
Python script
For the purpose of my example I will use a simple Python script which outputs messages to standard output along the way:
#!/usr/bin/python
import sys, getopt, time

def main(argv):
    argument = ''
    usage = 'usage: script.py -f <sometext>'

    # parse incoming arguments
    try:
        opts, args = getopt.getopt(argv,"hf:",["foo="])
    except getopt.GetoptError:
        print(usage)
        sys.exit(2)
    for opt, arg in opts:
        if opt == '-h':
            print(usage)
            sys.exit()
        elif opt in ("-f", "--foo"):
            argument = arg

    # print output
    print("Start : %s" % time.ctime())
    time.sleep( 5 )
    print('Foo is')
    time.sleep( 5 )
    print(argument)
    print("End : %s" % time.ctime())

if __name__ == "__main__":
    main(sys.argv[1:])
Above script will not execute immediately which makes it necessary to hold on to the process and read from its output until it finishes. We do not want to use it sequentially in a webapp as this might takes quite long time to execute. This script accepts arguments as well:
$ python script.py -f sometext- passsometextas a value for optionfoo$ python script.py --foo sometext- similar as above$ python script.py -h- prints help text
Node server
There are three main problems:
- call Python script,
- pass script output to client and
- render output in the client.
Lets start with the former by creating simple Node.js program, call it server.js and prepare to fill in the code.
Run python script
One of the accessible commands provided in Node.js API is child_process.spawn().
The child_process.spawn() method spawns a new process using the given command, with command line arguments in args.
So to run above Python script, provided it is called script.py, we could add following to out server.js:
const path = require('path')
const {spawn} = require('child_process')

/**
 * Run python script, pass in `-u` to not buffer console output
 * @return {ChildProcess}
 */
function runScript(){
  return spawn('python', [
    "-u",
    path.join(__dirname, 'script.py'),
    "--foo", "some value for foo",
  ]);
}

const subprocess = runScript()

// print output of script
subprocess.stdout.on('data', (data) => {
  console.log(`data:${data}`);
});
subprocess.stderr.on('data', (data) => {
  console.log(`error:${data}`);
});
subprocess.on('close', () => {
  console.log("Closed");
});
In above example the script output is going to come in through .on('data', callback). Also it was necessary to use -u flag when running the script to prevent Python from buffering output, otherwise data event would not get print() statements from script up until the end of execution.
To test if everything works just run it and check the Python script output is visible in the shell.
$ node server.js
Start : Tue Nov 13 18:57:53 2018
.
..
...
....
Foo is
some value for foo
....
...
..
.
End : Tue Nov 13 18:58:03 2018
Render script output in HTTP response
If you are using Express framework then sending back output would be as easy as piping the output of child process (running script) to response of HTTP request:
const express = require('express')
const app = express()

// <...>

app.get('/run', function (req, res) {
  const subprocess = runScript()
  res.set('Content-Type', 'text/plain');
  subprocess.stdout.pipe(res)
  subprocess.stderr.pipe(res)
})

app.listen(8080, () => console.log('Server running'))
Unfortunately piping everything back to response requires client either to understand that response is chunked or to wait for execution of script to finish before rendering output. Latter is going to happen if you will be consuming endpoint with the likes of jQuery:
jQuery.get("/run").done(function (data) {
  console.log(data) // rendered after all data was transferred
})
Using WebSocket to render output
To send back script output in chunks, we could use WebSockets, this will require Node.js server to accept incoming requests via this protocol and the client to be able to connect to it.
First lets install some dependencies:
$ npm i -S ws
Then expand our previous server.js to deal with new WebSocket conections. First we ought to listen to new connections:
const express = require('express')
const app = express()
const http = require("http")
const WebSocket = require("ws")
const server = http.createServer(app);
const wss = new WebSocket.Server({server});

wss.on('connection', (ws) => {
  ws.on('message', (message) => {
    ws.send(`You sent -> ${message}`);
  });
  ws.send('Connection with WebSocket server initialized');
});

server.listen(8080, () => console.log('Server running'))
Client can now easily send messages to the server:
var conn = {}
function openConnection() {
  if (conn.readyState === undefined || conn.readyState > 1) {
    conn = new WebSocket('ws://' + window.location.host + '/');
    conn.onopen = function () {
      console.log("Socket open")
    };
    conn.onmessage = function (event) {
      console.log(event.data)
    };
    conn.onclose = function (event) {
      console.log("Socket closed")
    };
  }
}
if (window.WebSocket === undefined) {
  console.log("Sockets not supported")
} else {
  openConnection();
}
The caveat here is that now in order to request the server to start executing the script it is easier to use same WebSocket connection instead of HTTP request. If we wanted to use HTTP it would be necessary to know which WebSocket connection to respond to in the server and for this some sort of session identification would need to be implemented.
For now lets just agree that when client sends message "run", then server will understand it as a request to run a script.
After I lump it all together in one Node.js script I get:
const path = require('path')
const {spawn} = require('child_process')
const express = require('express')
const app = express()
const http = require("http")
const WebSocket = require("ws")
const server = http.createServer(app);
const wss = new WebSocket.Server({server});

function runScript() {
  return spawn('python', [
    "-u",
    path.join(__dirname, 'script.py'),
    "--foo", "some value for foo",
  ]);
}

app.get('/', function (req, res) {
  res.send(`<!doctype html>
<html lang="en">
<body>
<button type="button" onclick="runWebsocket()">Run with websocket</button>
<pre id="outputWebsocket"></pre>

<script>
  var outputWebsocket = document.getElementById("outputWebsocket")
  function runWebsocket() {
    outputWebsocket.innerText = ""
    openConnection(function (connection) {
      connection.send("run")
    })
  }
  function appendWSText(text) {
    outputWebsocket.innerText += text
  }
  var conn = {}
  function openConnection(cb) {
    // uses global 'conn' object
    if (conn.readyState === undefined || conn.readyState > 1) {
      conn = new WebSocket('ws://' + window.location.host + '/');
      conn.onopen = function () {
        appendWSText("\\nSocket open")
        if(typeof cb === "function"){
          cb(conn)
        }
      };
      conn.onmessage = function (event) {
        appendWSText(event.data)
      };
      conn.onclose = function (event) {
        appendWSText("\\nSocket closed")
      };
    } else if(typeof cb === "function"){
      cb(conn)
    }
  }
  if (window.WebSocket === undefined) {
    appendWSText("\\nSockets not supported")
  } else {
    openConnection();
  }
</script>
</body>
</html>`)
})

function runScriptInWebsocket(id, ws) {
  const child = runScript("foobar")
  child.stdout.on('data', (data) => {
    ws.send(`${id}:${data}`);
  });
  child.stderr.on('data', (data) => {
    ws.send(`${id}:error:\n${data}`);
  });
  child.stderr.on('close', () => {
    ws.send(`${id}:done`);
  });
}

let id = 1
wss.on('connection', (ws) => {
  const thisId = id++;
  ws.on('message', (message) => {
    ws.send(`You sent -> ${message}`);
    if ("run" === message) {
      runScriptInWebsocket(thisId, ws)
    }
  });
  ws.send('Connection with WebSocket server initialized');
});

server.listen(8080, () => console.log('Server running'))
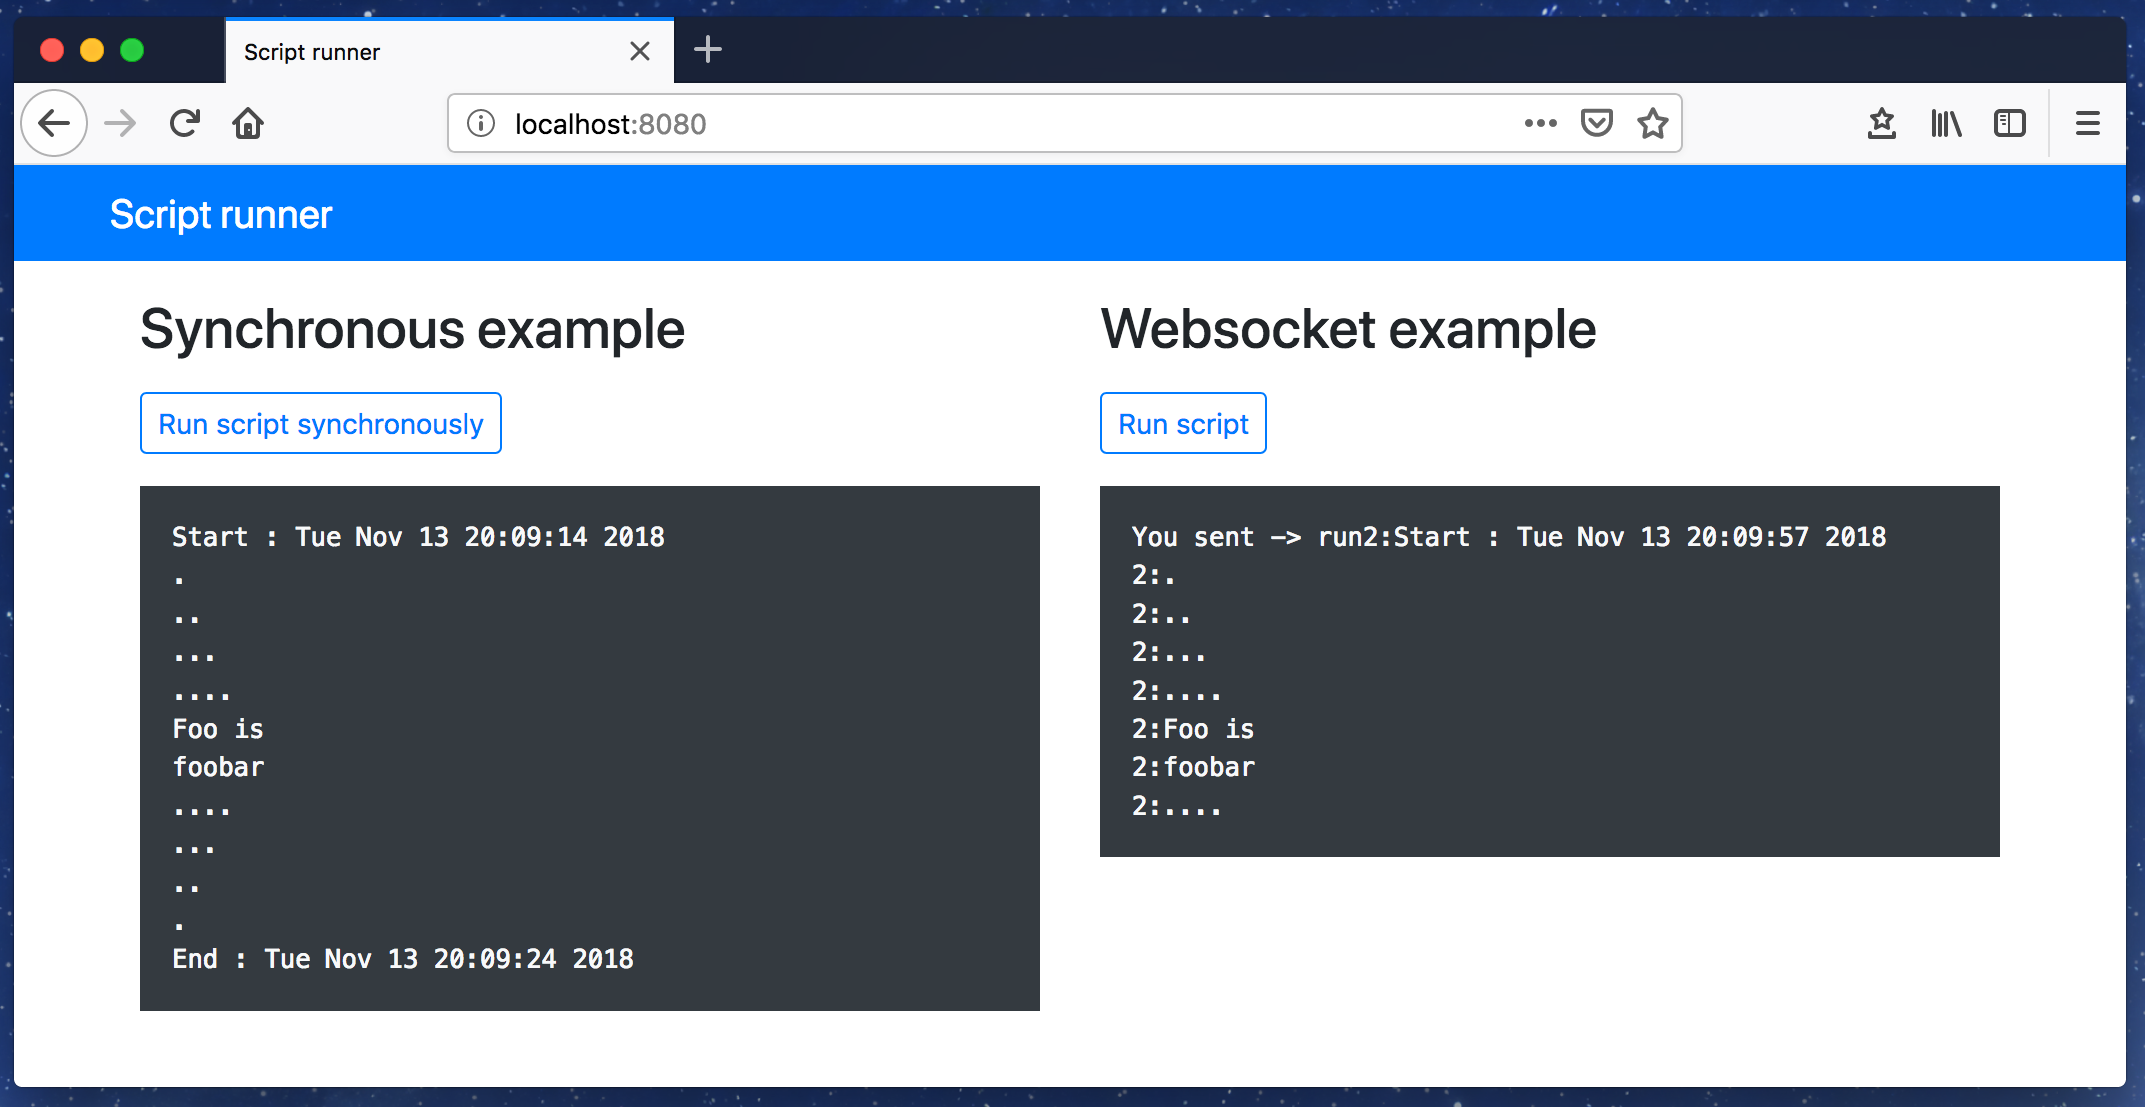
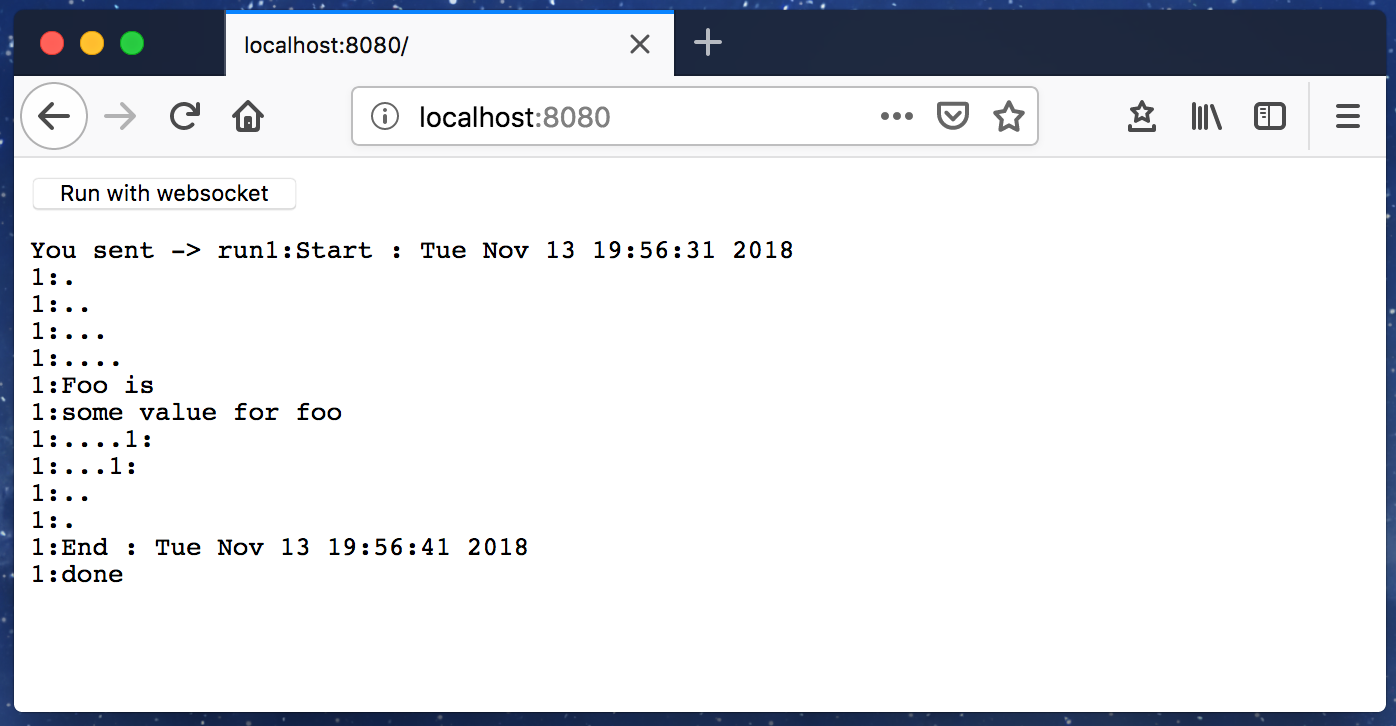
Above will start a server and will render simple HTML which will be able to deal with WebSocket.
Source code
The source files for this example are available in Github repository ivarprudnikov/use-python-in-node